Create dataset and connect it to a source
Follow these two primary steps to create a dataset and connect it to a source.
Using the UI:
Step 1: Create a dataset
Start by giving your dataset a unique name. Once you have named it, the platform will assign it a dataset ID. This ID is not fixed and can be edited according to your needs.
Step 2: Connect your dataset to a configured source
Once your dataset has been created, you can start and ingest data into it directly via our REST api's, or to connect it to a file storage source as described here.
If you don't have a source yet
If you have not set up a source yet, don't worry. Follow the instructions provided to configure a new source (link to documentation of connecting to a source).
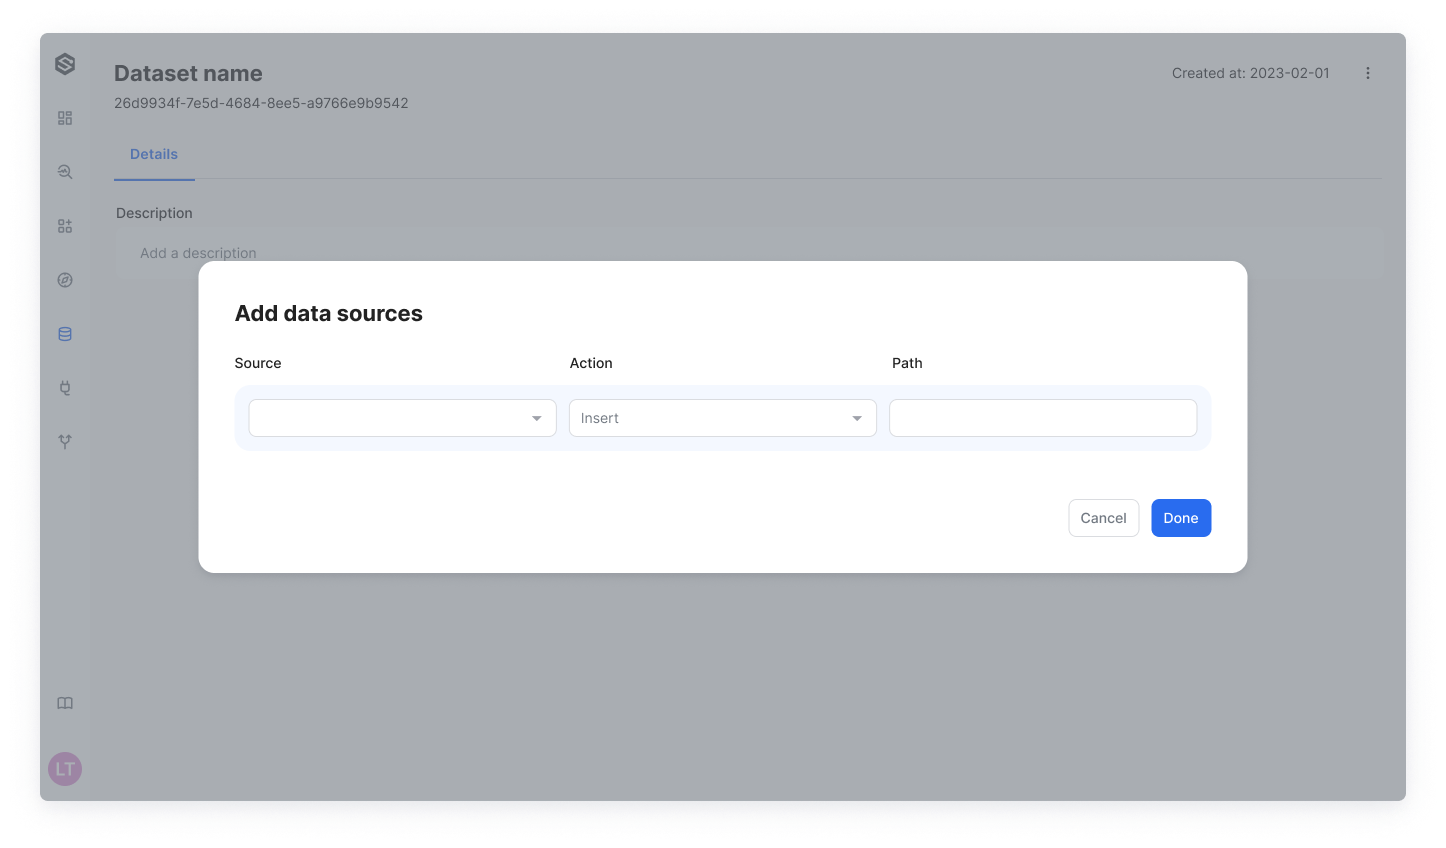
Select the relevant source
From your list of configured sources, select the one that is relevant to the dataset you just created.
For S3 or GCS
Notification action selection:
Choose which action will trigger a notification to the platform. The options include either the insertion of new data or an update to the existing data.
Pay attention
The initial data insertion into the dataset requires an "Insert" action.
Specify the file or folder path:
Finally, provide the specific path to the file or folder in your source that is relevant to your new dataset. The path will already contain a prefix, so you should only fill in what comes after the prefix. The provided prefix:
s3://<bucket name>gs://<bucket name>
CSV File Format Requirements:
- Column Name Composition: Each column name can include letters (a-z, A-Z), numbers (0-9), or underscores (_). It must start with a letter or an underscore.
- Maximum Length: Column names cannot exceed 300 characters.
- Restricted Prefixes: Column names cannot begin with any of the following prefixes:
_TABLE__FILE__PARTITION_ROW_TIMESTAMP__ROOT___COLIDENTIFIER- Uniqueness: Duplicate column names are not allowed, regardless of letter casing. For instance,
Column1andcolumn1are considered identical.
Using the SDK:
Step 1: Create a dataset
The first stage in monitoring your data is to create a dataset. A dataset is where your data will be stored and analyzed.
dataset = sw.dataset.create(name="my dataset")
Step 2: Connect a source to a dataset
Once both the source and the dataset are ready, you'll need to link them to establish data ingress into your dataset.
from superwise_api.models.dataset_source.dataset_source import IngestType

dataset_source = sw.dataset_source.create(dataset_id=dataset.id, source_id=source.id, folder="folder name", ingest_type=IngestType.INSERT)
Folder parameter
provide the specific path to the file or folder in your source that is relevant to your new dataset. The path will already contain a prefix, so you should only fill in what comes after the prefix. The provided prefix:
s3://<bucket name>gs://<bucket name>
Additional Information on Datasets
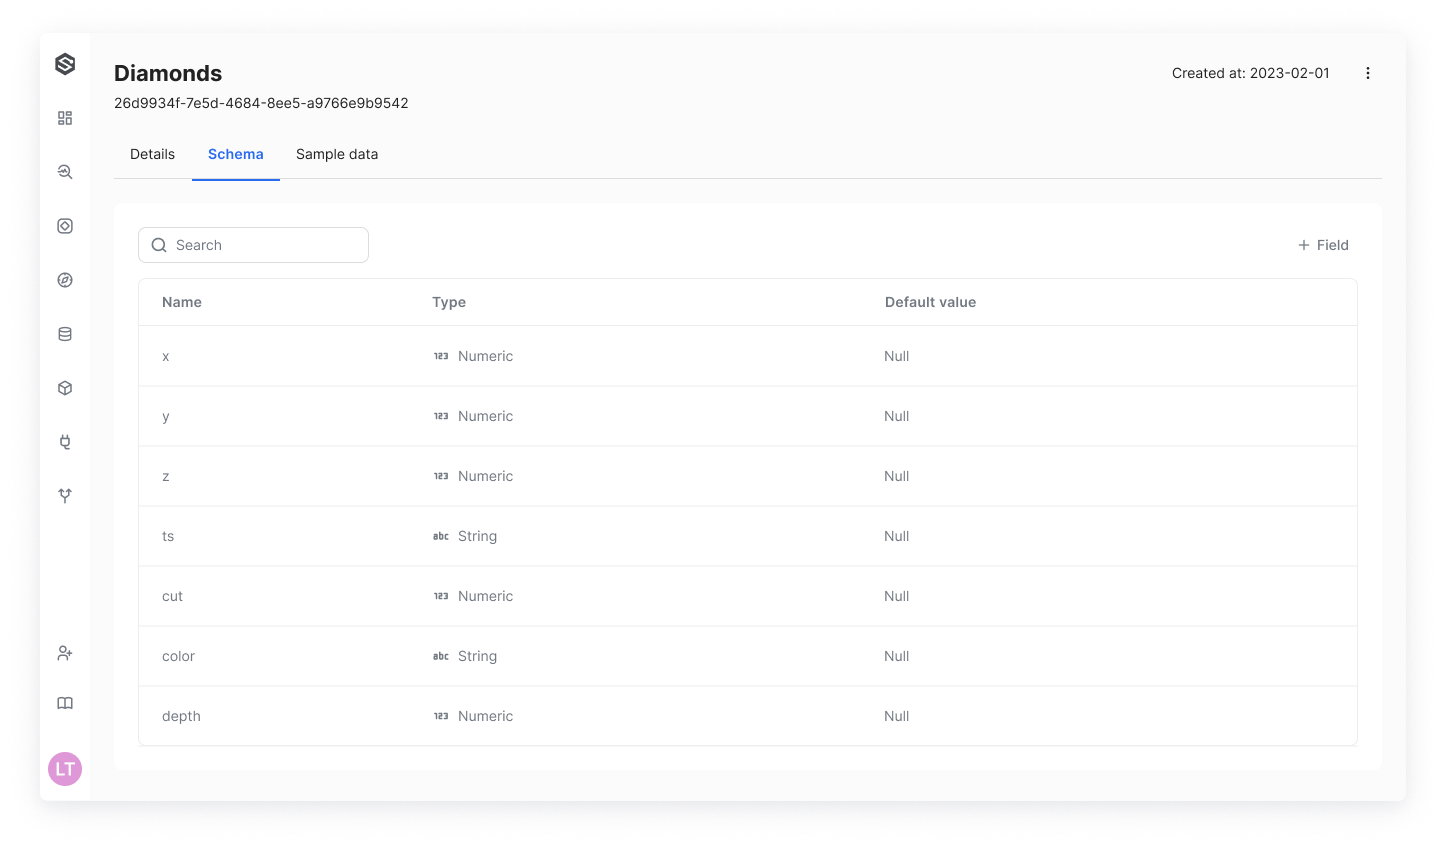
Schema View
After you initially insert data into a dataset, SUPERWISE® automatically detects the schema of the data. You can then either view or edit the schema fields as needed.
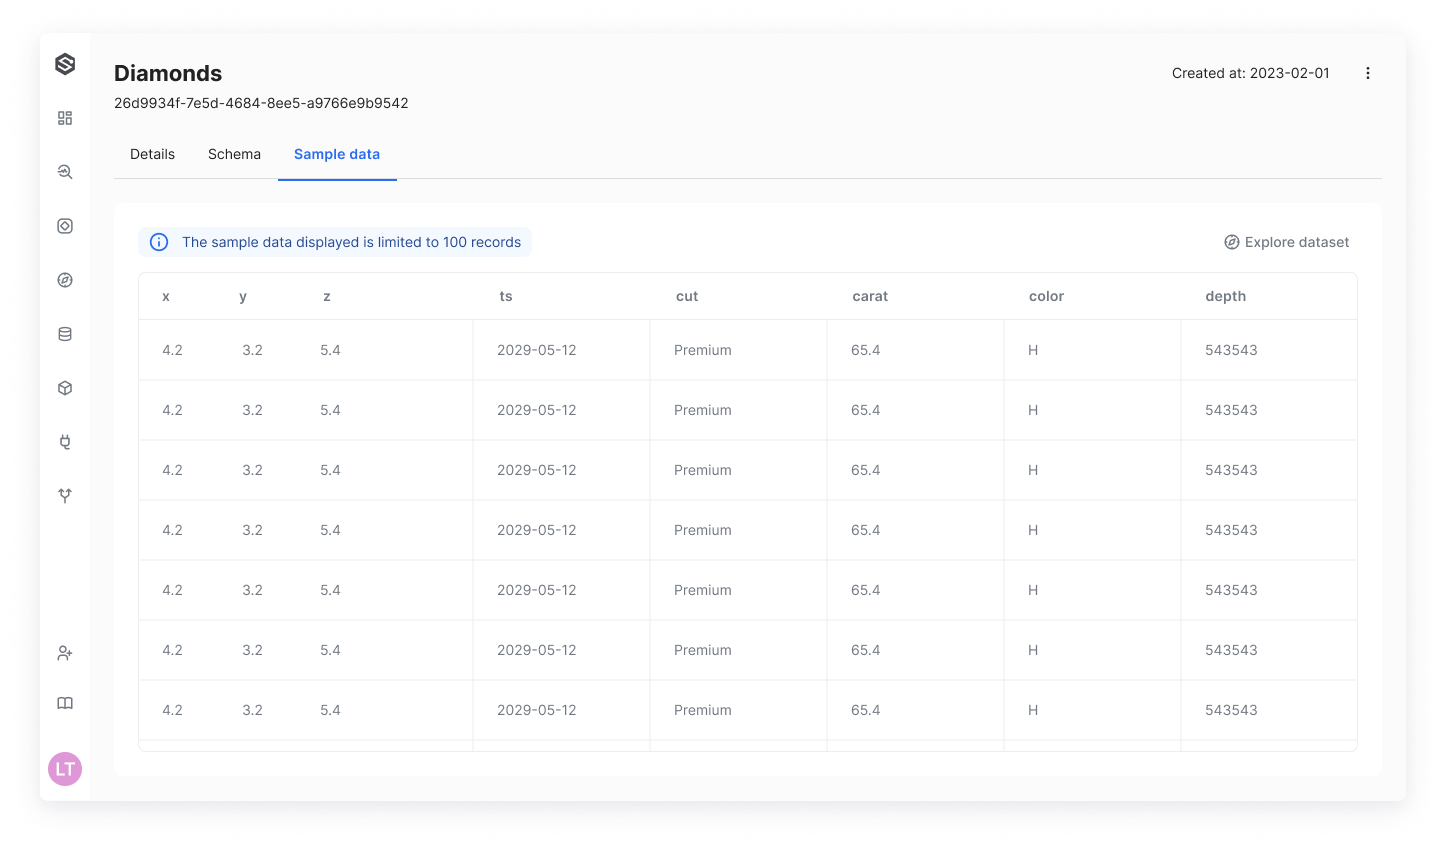
Sample Data View
SUPERWISE® automatically generates a view of the dataset’s sample data that includes the first 100 records. This provides you with an immediate sense of the data you have just uploaded.
Updated 11 days ago