Connect new source
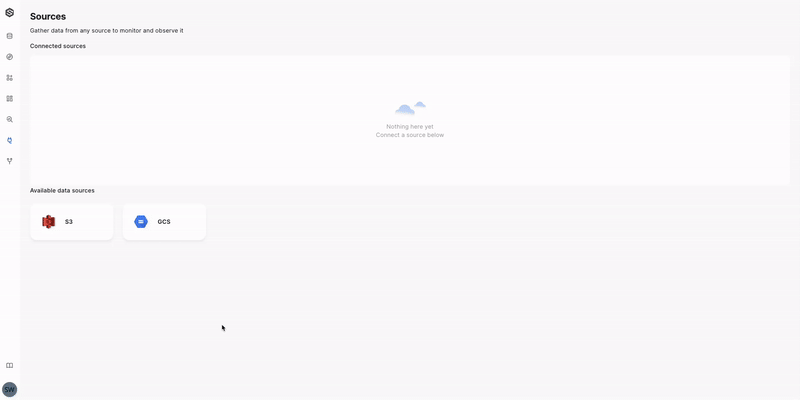
SUPERWISE® offers a seamless data integration process, allowing you to link your data directly to our platform. We currently support Amazon S3 and GCP buckets as Sources.
Supported file types
PERWISE® supports CSV, Parquet, and JSONL file types. Please ensure your files meet the required format for successful processing.
File name limitations
File names should only include letters and numbers (A-Za-z0-9).
1:1 Relationship between Bucket and Source
Each bucket requires a unique Source configuration. You can only designate the same bucket as a Source once. However, you can use different folders within the same bucket for different datasets while still using the same Source.
To connect your data, follow the instructions below:
Connect to an S3 source
To connect to an S3 source, you'll need the following bucket information:
- Bucket ARN: The Amazon Resource Name for your S3 bucket. It includes the service (S3), region, AWS account ID, and bucket name.
- Format: arn:aws:s3:::bucket_name
- SQS ARN: The ARN for an SQS queue. This queue keeps our platform synchronized with your bucket by monitoring new file uploads.
- Format: arn:aws:sqs:region:account-id:queue-name
- Access Key ID: A unique identifier for an AWS IAM user or role.
- Secret Access Key: The secret part of the credential pair, similar to a password.
Prerequisites
To create a source in our platform, you need to set up the communication and permission structure within AWS. This allows our platform to access and interact with your S3 data.
- Set Variables: Define the following variables, replacing the placeholders with your actual values:
REGION="fill in"
QUEUE_NAME="fill in"
BUCKET_NAME="fill in"
ACCOUNT_ID=$(aws sts get-caller-identity --output text --query Account)
SOURCE_NAME="superwise-s3-source-${BUCKET_NAME}-${QUEUE_NAME}"
USER_NAME=$SOURCE_NAME
export AWS_PAGER=""
- Create SQS Queue:Execute these AWS CLI commands to create an SQS queue. This queue will be linked to your S3 bucket to receive notifications.
QUEUE_URL=$(aws sqs create-queue --queue-name $QUEUE_NAME --region $REGION --output text --query 'QueueUrl')
QUEUE_ARN=$(aws sqs get-queue-attributes --queue-url $QUEUE_URL --attribute-names QueueArn --output text --query 'Attributes.QueueArn')
- Create SQS Queue access Policy: This policy allows your S3 bucket to send messages to the SQS queue when events (like file uploads) occur. It also ensures that only your bucket can send these notifications to this specific queue.
- The policy is configured and applied to the SQS queue, detailing how the bucket can interact with the queue.
cat <<EOF > /tmp/${QUEUE_NAME}-policy.json
{
    "Version": "2012-10-17",
    "Id": "${QUEUE_NAME}",
    "Statement": [
        {
            "Sid": "${QUEUE_NAME}",
            "Effect": "Allow",
            "Principal": {
                "Service": "s3.amazonaws.com"
            },
            "Action": [
                "SQS:SendMessage"
            ],
            "Resource": "${QUEUE_ARN}",
            "Condition": {
                "ArnLike": {
                    "aws:SourceArn": "arn:aws:s3:::${BUCKET_NAME}"
                },
                "StringEquals": {
                    "aws:SourceAccount": "${ACCOUNT_ID}"
                }
            }
        }
    ]
}
EOF
QUEUE_POLICY=$(</tmp/${QUEUE_NAME}-policy.json)
aws sqs set-queue-attributes --queue-url $QUEUE_URL --attributes Policy=\"${QUEUE_POLICY//\"/\\\"}\"
- Create IAM PolicyThis IAM policy defines the minimum permissions our platform needs to interact with your S3 bucket and SQS queue. It includes permissions to:
- Retrieve and update bucket notifications.
- Retrieve messages from the SQS queue and delete them after processing.
- Access objects in the S3 bucket.
- This policy balances necessary access with security, providing the least privilege required for operation.
cat <<EOF > /tmp/${SOURCE_NAME}-policy.json
{
    "Version": "2012-10-17",
    "Statement": [
        {
            "Sid": "S3SourceSetBucketConfig",
            "Effect": "Allow",
            "Action": [
                "s3:GetBucketNotification",
								"s3:PutBucketNotification"
            ],
            "Resource": "arn:aws:s3:::${BUCKET_NAME}"
        },
        {
            "Sid": "S3SourceConsumeMessages",
            "Effect": "Allow",
            "Action": [
                "sqs:GetQueueUrl",
                "sqs:ReceiveMessage",
                "sqs:DeleteMessage"
            ],
            "Resource": "${QUEUE_ARN}"
        },
        {
            "Sid": "S3SourceBucketAccess",
            "Effect": "Allow",
            "Action": [
                "s3:GetObject"
            ],
            "Resource": "arn:aws:s3:::${BUCKET_NAME}/*"
        }
    ]
}
EOF
POLICY_ARN=$(aws iam create-policy --policy-name $SOURCE_NAME --policy-document file:///tmp/${SOURCE_NAME}-policy.json --output text --query 'Policy.Arn')
- Create IAM User and Credentials:Create an IAM user and generate security credentials (Access Key ID and Secret Access Key). Our platform uses these to authenticate and access your S3 bucket and SQS queue.
- The IAM user is linked to the permissions defined in the IAM policy.
- The access keys are provided to our platform for secure data access.
aws iam create-user --user-name $USER_NAME
aws iam create-access-key --user-name $USER_NAME --output table
Pay attention!
Take a note of the secret key
- Attach the IAM policy to the user
aws iam attach-user-policy --user-name $USER_NAME --policy-arn $POLICY_ARN
By following these steps, you'll establish a secure, private connection between your AWS resources and our platform, enabling seamless data integration. For more details on SQS queue setup, refer to theAWS documentation.
Using the UI
Before you begin, ensure you've completed all prerequisites.
Here's how to create a new Source:
- Open the Source creation form: Click the "S3" button.
- Name your Source: Enter a descriptive name for easy identification.
- Connect to Amazon S3: Provide the S3 bucket's ARN.
- Connect to Amazon SQS: Provide the SQS ARN.
- Authenticate with credentials:
- Enter your Access Key ID.
- Enter your Secret Access Key.
- Save your Source: Click the "Done" button to save and create the Source.
Using the SDK
Ensure you've completed all prerequisites before using the SDK. Then, proceed with the following code snippet:
source = sw.source.create_s3_source(
  name="my source",
  bucket_arn="arn:aws:s3:::my-bucket-arn",
  queue_arn="arn:aws:sqs:my-queue-arn",
  aws_access_key_id="access_key",
  aws_secret_access_key="secret_key"
)
Connect to a GCP source
When integrating a GCP source, you'll need specific information about your storage bucket:
- Bucket name: The unique identifier for your Google Cloud Storage bucket.
- PubSub topic name: To keep the platform in sync with your bucket, configure a Google Cloud Pub/Sub topic. Our system will monitor this topic for new file uploads.
- Service account key: A JSON file containing credentials for your GCP service account, required for authentication and authorization.
On-Premises Configuration Flexibility
For on-premises setups, a service account might not be necessary, depending on your specific infrastructure and configuration settings..
Prerequisites for GCP Connection
To integrate a Google Cloud Storage (GCS) source with our platform, you must address several prerequisites. These steps are essential for setting up the correct permissions and ensuring secure communication between our platform and your Google Cloud resources.
- Set Variables:These are placeholders you need to replace with actual values for your Google Cloud project and resources.
GCP_PROJECT_ID="fill in"
GCP_SERVICE_ACCOUNT_NAME="fill in"
GCP_TOPIC_NAME="fill in"
GCP_BUCKET_NAME="fill in"
GCP_PROJECT_ROLE="superwise.source.gcs.pubsub.subscriber"
GCP_TOPIC_ROLE="superwise.source.gcs.pubsub.topicSubscriber"
GCP_BUCKET_ROLE="superwise.source.gcs.objectViewer"
- Create IAM Roles:Custom roles with limited permissions are created to minimize the risk of unauthorized access and ensure Superwise has only the strictly necessary permissions.
- Project-level role: Allows Superwise to subscribe to Pub/Sub topics, enabling notifications when new files are added to the bucket.
- Topic-level role: Ensures Superwise can attach a subscription to the Pub/Sub topic and receive messages.
- Bucket-level role: Grants Superwise the ability to view and list objects in the GCS bucket, which is necessary for reading data files.
.
# Project level role
gcloud iam roles create ${GCP_PROJECT_ROLE} \
		--project ${GCP_PROJECT_ID} \
    --title "Superwise GCS Source Pub/Sub Subscriber" \
    --description "Allows Superwise GCS Source to subscribe to Pub/Sub topics (applied on the project level)" \
    --stage BETA \
    --permissions "pubsub.subscriptions.consume,pubsub.subscriptions.get,pubsub.subscriptions.create,pubsub.subscriptions.delete"

# Topic level role
gcloud iam roles create ${GCP_TOPIC_ROLE} \
		--project ${GCP_PROJECT_ID} \
    --title "Superwise GCS Source Pub/Sub Topic Subscriber" \
    --description "Allows Superwise GCS Source to subscribe to Pub/Sub topics (applied on the topic level)" \
    --stage BETA \
    --permissions "pubsub.topics.attachSubscription,pubsub.topics.get"

# Bucket level role
gcloud iam roles create ${GCP_BUCKET_ROLE} \
		--project ${GCP_PROJECT_ID} \
    --title "Superwise GCS Source Storage Object Viewer" \
    --description "Allows Superwise GCS Source to subscribe to Pub/Sub topics (applied on the bucket level)" \
    --stage BETA \
    --permissions "storage.buckets.get,storage.objects.get,storage.objects.list"
- Create Service Account and Generate Key: A service account is an identity Superwise will use to securely interact with your Google Cloud resources.
- The service account should be created specifically for Superwise's needs.
- A key for this service account is then generated and used by Superwise to authenticate with Google Cloud.
# Service account
gcloud iam service-accounts create ${GCP_SERVICE_ACCOUNT_NAME} --project ${GCP_PROJECT_ID}

# Service account key
gcloud iam service-accounts keys create \
  --project ${GCP_PROJECT_ID} \
  --iam-account ${GCP_SERVICE_ACCOUNT_NAME}@${GCP_PROJECT_ID}.iam.gserviceaccount.com \
  /tmp/${GCP_SERVICE_ACCOUNT_NAME}.json
- Set Project IAM Bindings: Associate the custom roles with the service account at the project level to enforce proper permissions.
gcloud projects add-iam-policy-binding ${GCP_PROJECT_ID} \
    --member serviceAccount:${GCP_SERVICE_ACCOUNT_NAME}@${GCP_PROJECT_ID}.iam.gserviceaccount.com \
    --role projects/${GCP_PROJECT_ID}/roles/${GCP_PROJECT_ROLE}
- Configure Notification Mechanism and Permissions
- Topic: A Pub/Sub topic is created as a messaging channel for events like file additions to the bucket.
- Topic permissions: Set permissions to allow the service account to subscribe to this topic.
# Topic
gcloud pubsub topics create ${GCP_TOPIC_NAME} --project ${GCP_PROJECT_ID}

# Topic permissions
gcloud pubsub topics add-iam-policy-binding ${GCP_TOPIC_NAME} \
  --project ${GCP_PROJECT_ID} \
  --member serviceAccount:${GCP_SERVICE_ACCOUNT_NAME}@${GCP_PROJECT_ID}.iam.gserviceaccount.com \
  --role projects/${GCP_PROJECT_ID}/roles/${GCP_TOPIC_ROLE}
- Bucket:Configure notifications for the GCS bucket to publish to the Pub/Sub topic for events such as object creation (OBJECT_FINALIZE).
- Bucket permissions: Set permissions to allow the service account to access the data in the bucket under the assigned role.
# Notifications
gcloud storage buckets notifications create gs://${GCP_BUCKET_NAME} \
  --project ${GCP_PROJECT_ID} \
	--topic projects/${GCP_PROJECT_ID}/topics/${GCP_TOPIC_NAME} \
	--event-types OBJECT_FINALIZE

# Bucket permissions
gcloud storage buckets add-iam-policy-binding gs://${GCP_BUCKET_NAME} \
    --project ${GCP_PROJECT_ID} \
    --member serviceAccount:${GCP_SERVICE_ACCOUNT_NAME}@${GCP_PROJECT_ID}.iam.gserviceaccount.com \
    --role projects/${GCP_PROJECT_ID}/roles/${GCP_BUCKET_ROLE}
By following these steps, you provide Superwise with the necessary roles and access to securely connect to GCS and Pub/Sub services for efficient data sourcing. This setup is crucial for maintaining a secure environment that facilitates specific functionality without over-privileging, adhering to the best practices of least privilege access.
For more information on configuring a Pub/Sub topic, please refer to theGoogle Cloud documentation.
Using the UI
Before you begin, ensure you've completed all prerequisites.
Here's how to create a new Source:
- Open the Source creation form: Click the "GCP" button.
- Name your Source: Enter a descriptive name for easy identification.
- Provide the bucket information: Enter the bucket name.
- Connect a Pub/Sub topic: Add the Pub/Sub topic name.
- Authenticate with service account: Upload the service account JSON file.
- Save your Source: Click the "Done" button to save and create the Source.
Using the SDK
To create a Source using the SDK, please ensure you've completed all prerequisites. Once that's done, proceed with the following code snippet:
source = sw.source.create_gcs_source(
  name="my source",
  bucket_name="my_bucket",
  pubsub_topic="projects/my_project/topics/my_topic",
  service_account={}
)
Updated 15 days ago